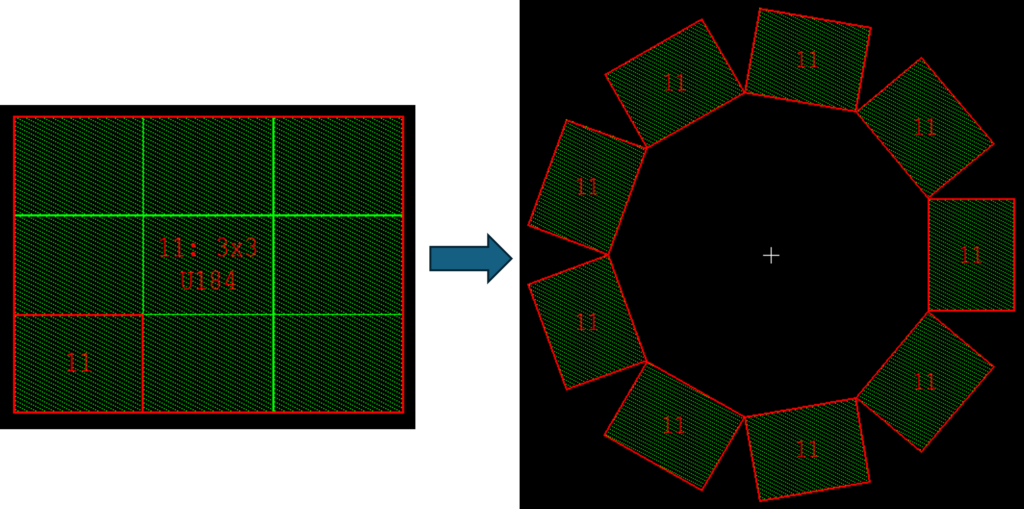
Tanner L-Edit 에서 특정 Object 를 Array 할 때, 기본적으로 사각형 형태로만 Array 가 가능합니다.
이때 원형으로 Array 하고 싶은 경우, 아래의 방법으로 진행하면 됩니다.
1. 먼저 Tanner EDA Tools Examples 를 설치한 후, 설치된 위치로 이동합니다.
2. Tanner EDA 폴더에 UPI_Macros 폴더가 있는지 확인합니다.
C:\Users\EDNC-AHKIM\TannerEDA\TannerTools_v2023.2\FeaturesByTool\L-Edit\UPI_Macros\PolarArray
3. L-Edit 을 실행한 후, Layout View 에서 Cell 을 Open 합니다.
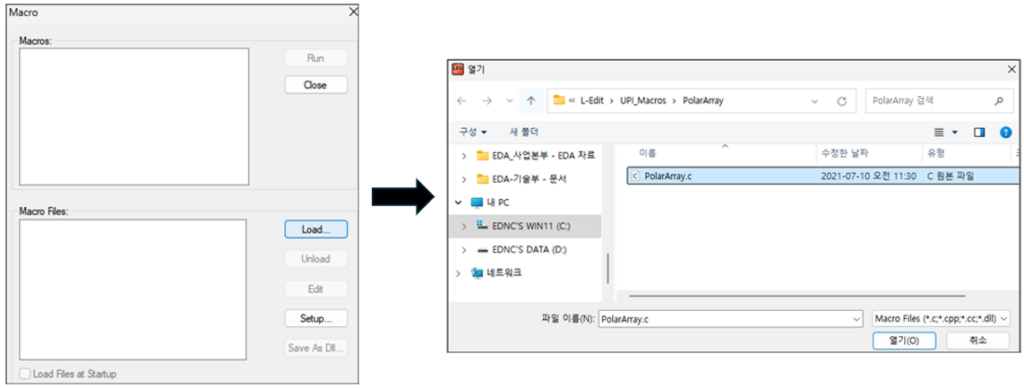
4. Tools > Macro…> Load 를 클릭한 후, PolarArray.c 매크로를 선택합니다.
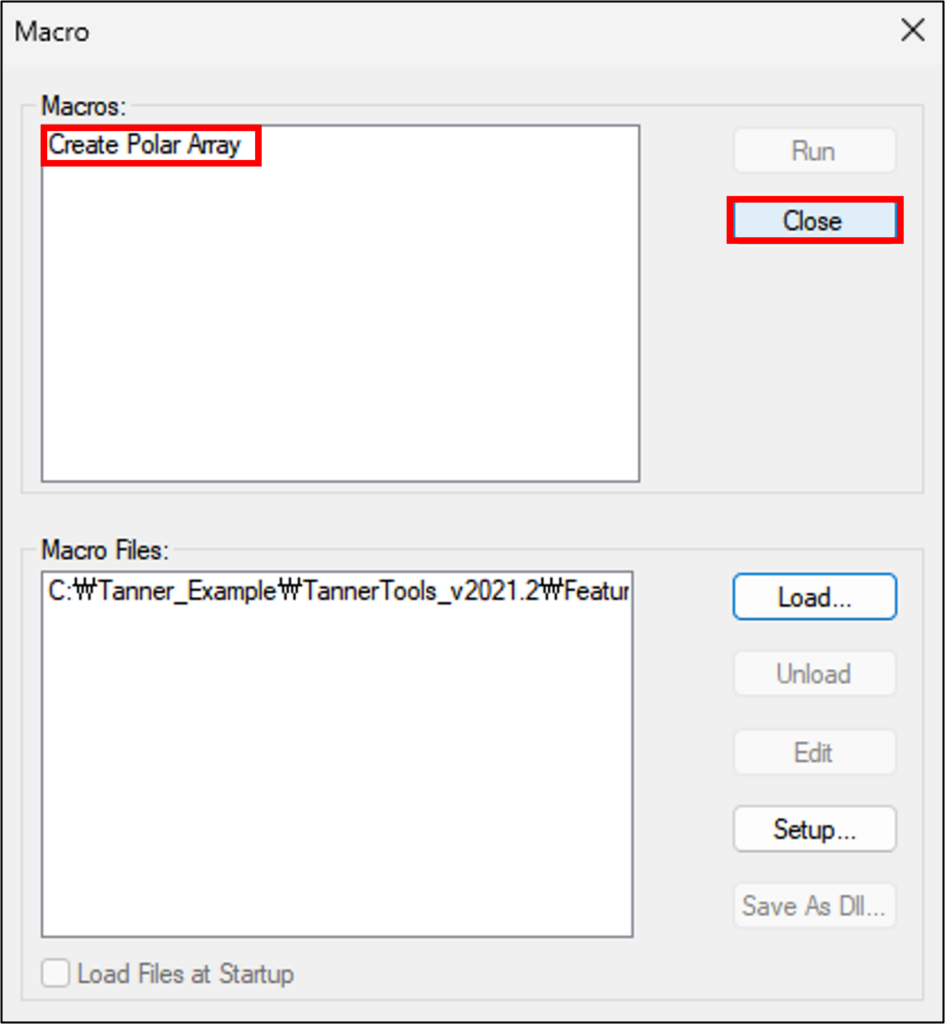
4-1. Macros 에 Create Polar Array 가 생성되면, Close 를 클릭합니다.
(Load Files at Startup 옵션은 L-Edit 이 열릴 때마다 매크로가 자동으로 Load 되도록 하는 옵션입니다.)
4-1-1. Macro 를 실행하려는 Cell 에서 Tools > Create Polar Array 를 클릭합니다.
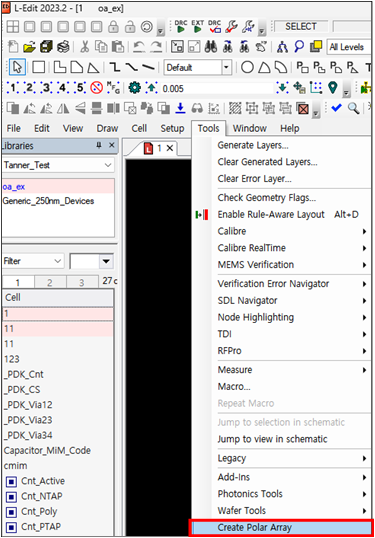
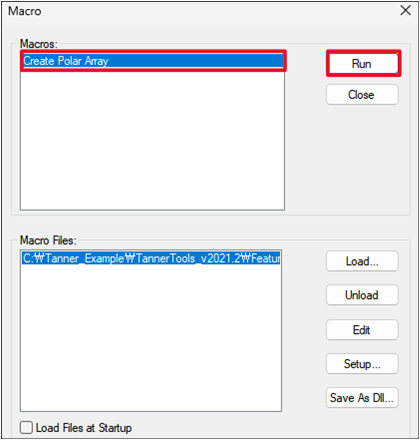
4-2. Macros 에 Create Polar Array 가 생성되면, Create Polar Array 를 선택한 다음 Run 을 클릭합니다.
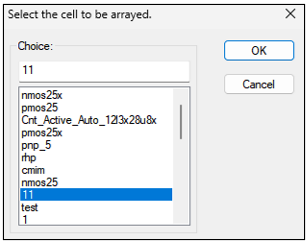
5. 아래와 같은 창이 나오면 array 하려는 cell 을 선택하고 OK 를 클릭합니다.
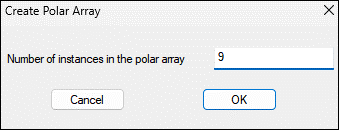
6. Create Polar Array 창이 나오면, 원하는 인스턴스 수를 입력하고 OK 를 클릭합니다.
(인스턴스 수는 최소 3개부터 가능합니다.)
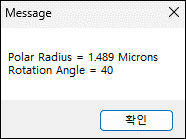
7. 마우스 왼쪽 버튼으로 Layout View 의 아무 곳이나 클릭하여 Array 의 중심을 선택하면, Macro 가 반지름과 회전 각도를 계산하여 Message 창에 표시됩니다.
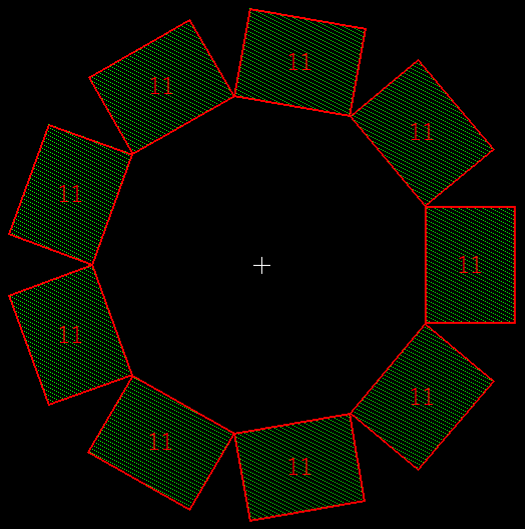
8. 확인을 클릭하면 아래와 같이 선택한 cell 로 PoalrArray 가 생성된 것을 확인할 수 있습니다.